GRBL (pronounced "gerbil") is free, open-source firmware that turns an Arduino into a CNC motion controller. It reads G-code sent over USB and turns it into precisely timed step and direction pulses for your stepper motors. It runs most 3018-style desktop routers, a large share of diode laser engravers, and countless DIY machines, and it's what earlier Shapeoko and X-Carve controllers were built on.
This guide covers what GRBL does, what it can't do, how to install and set it up, and what to use when you outgrow it. For the details, see the companion pages:
- GRBL Settings: every
$setting explained, with a steps per mm calculator. - GRBL Alarm and Error Codes: what each
ALARM:anderror:message means and how to fix it.
GRBL at a Glance
| What it is | Firmware for the motion controller (not software you run on your PC) |
| Current version | GRBL 1.1h, released August 2019 |
| Runs on | Arduino Uno, Nano, and other ATmega328P boards |
| Axes | 3 (X, Y, Z); a dual-motor axis is a compile-time option |
| Connection | USB serial at 115200 baud |
| Max step rate | 30 kHz |
| License | Free, open source (GPLv3) |
| Source | github.com/gnea/grbl |
What GRBL Does
A CNC machine needs three layers of software:
- CAD and CAM on your computer turn a design into toolpaths and write them out as G-code.
- A G-code sender on your computer (Universal Gcode Sender, gSender, Candle, LaserGRBL, and so on) streams that G-code to the controller and gives you jog buttons, a position readout, and a start button.
- The controller firmware, GRBL, runs on the Arduino. It parses each G-code line, plans the motion, and generates the step pulses that move the motors.
GRBL is only that third layer. It has no screen and no user interface of its own; everything you see on your computer belongs to the sender.
What makes GRBL good at its job:
- Look-ahead acceleration planning. GRBL plans several moves ahead so it can carry speed through corners and slow down only as much as the path requires.
- Smooth step timing. It generates clean step pulses at up to 30 kHz, which is plenty for typical hobby machines.
- Real CNC features: arcs (G2/G3), homing, hard and soft limits, probing (G38.x), work coordinate systems G54 to G59, jogging, feed/rapid/spindle overrides, a safety door input, and PWM spindle speed control.
- Laser mode. With
$32=1, GRBL changes laser power on the fly without stopping between moves, which is why so many laser engravers run it.
Who Makes GRBL, and Is It Still Maintained?
GRBL was written by Simen Svale Skogsrud in Norway, and Sungeun "Sonny" Jeon has led development since. The official repository is gnea/grbl on GitHub (the older grbl/grbl repository holds the original project).
The last release, GRBL 1.1h, came out in August 2019. There hasn't been a new version since, because GRBL fills the 32 KB of flash on an ATmega328P almost completely; there's no room left for new features. Development moved to 32-bit successors that keep GRBL's G-code dialect and $ commands:
- grblHAL: a 32-bit port with a hardware abstraction layer, so it runs on many processors (Teensy, STM32, RP2040, ESP32 and more). Supports more axes, tool changes, plugins, and much higher step rates.
- FluidNC: the successor to Grbl_ESP32 for ESP32 boards. Configured with a text file instead of recompiling, with WiFi and a built-in web interface.
GRBL 1.1 is still a perfectly good controller for a 3-axis hobby router or laser. Pick grblHAL or FluidNC if you need more axes, more speed, a tool changer, or network control.
Machines and Boards That Run GRBL
- Arduino Uno plus a CNC Shield. The classic DIY setup: an Uno, a "CNC Shield V3" board, and plug-in A4988 or DRV8825 stepper drivers. Cheap and well documented, but the plug-in drivers are only good for small NEMA 17 motors.
- All-in-one GRBL boards. Most 3018-style routers and diode lasers ship with a single board that combines the ATmega328P, USB, and stepper drivers (Woodpecker boards are a common example). They come with GRBL already loaded.
- Arduino plus external drivers. For bigger machines, the Arduino sends step and direction signals to external drivers such as the TB6600 or DM542, which can run larger NEMA 23 motors.
- Commercial machines. Earlier Shapeoko and X-Carve controllers ran GRBL, and many current hobby machines use GRBL or a 32-bit successor.
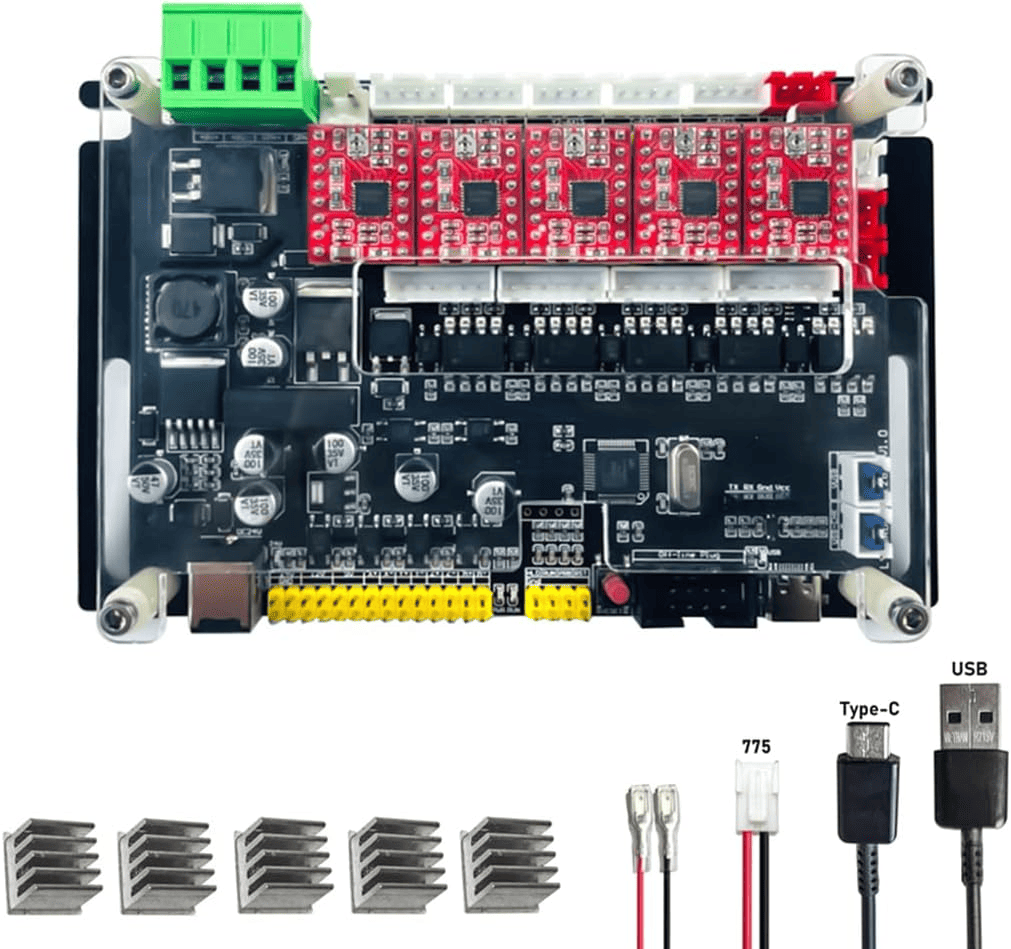
If you're building a DIY CNC machine, see our guides to CNC controllers, drivers, and boards and DIY CNC electronics.
Arduino Uno Pin Map (GRBL 1.1 Defaults)
If you're wiring a bare Arduino or checking a CNC shield, these are GRBL 1.1's default pins:
| Function | Uno pin |
|---|---|
| Step pulse X, Y, Z | D2, D3, D4 |
| Direction X, Y, Z | D5, D6, D7 |
| Stepper enable (all axes) | D8 |
| Limit switches X, Y, Z | D9, D10, D12 |
| Spindle PWM / enable | D11 |
| Spindle direction | D13 |
| Reset/abort, feed hold, cycle start | A0, A1, A2 |
| Coolant flood, mist | A3, A4 |
| Probe | A5 |
GRBL 0.8 and earlier used D11 for the Z limit and D12 for spindle enable. GRBL 0.9 swapped them so spindle speed could use the hardware PWM on D11, which is why some older shields and wiring diagrams don't match.
How to Install GRBL on an Arduino
Skip this if your machine came with a controller board; it already has GRBL. To load it onto a blank Arduino Uno or Nano:
- Install the Arduino IDE.
- Download the source code ZIP from the gnea/grbl releases page and unzip it.
- In the Arduino IDE, choose Sketch > Include Library > Add .ZIP Library and select the
grblfolder inside the unzipped folder (the one that containsconfig.h), not the top-level folder. - Open File > Examples > grbl > grblUpload.
- Select your board and port under Tools, then click Upload. The upload sends the whole GRBL firmware, even though the sketch itself looks empty.
The releases page also has a ready-made .hex file you can flash with a tool such as XLoader or avrdude, which skips the IDE entirely. Either way you get the default build; to change compile-time options like dual-axis support or the homing order, edit config.h before uploading.
Uploading GRBL erases the board's settings. If you're reflashing a machine that already works, save the output of $$ first so you can put your settings back.
Connecting and Configuring GRBL
Connect with any G-code sender, or the Arduino IDE's Serial Monitor, at 115200 baud. GRBL greets you with:
Grbl 1.1h ['$' for help]
Type $$ and press Enter to list the settings. Change one by sending $ + number + = + value, for example $100=800. GRBL replies ok and saves the value to EEPROM, so it survives power cycles.
The settings you'll set up first on a new machine:
| Setting | What it sets |
|---|---|
$100, $101, $102 |
Steps per mm for X, Y, Z. Get these right first; every distance depends on them. |
$110 to $112 |
Maximum rate for each axis (also the G0 rapid speed), mm/min |
$120 to $122 |
Acceleration for each axis, mm/sec² |
$3 |
Reverses an axis that moves the wrong way |
$22, $23 |
Enable homing, and which direction each axis homes |
$20, $21, $130 to $132 |
Soft limits, hard limits, and maximum travel |
$30, $31 |
Spindle RPM that maps to full and minimum PWM output |
$32 |
Laser mode, for laser engravers only |
Every setting, with defaults and tips, is on our GRBL settings page, along with a calculator for steps per mm from your motor, microstepping, and screw pitch or belt.
GRBL Commands You'll Use
Besides G-code, GRBL understands two kinds of commands of its own. The $ commands are typed as a line:
| Command | What it does |
|---|---|
$$ |
List all settings |
$x=value |
Change a setting |
$H |
Run the homing cycle |
$X |
Unlock after an alarm (use with care: GRBL may not know where the machine is) |
$# |
Show work offsets (G54 to G59, G28, G30, G92), tool length offset, and the last probe result |
$G |
Show the active G-code modes (units, distance mode, plane, WCS, and so on) |
$I |
Show the version and build info |
$C |
Check mode: GRBL parses G-code and reports errors without moving |
$J=... |
Jog, for example $J=G91 X10 F500 |
$RST=$ |
Restore all settings to defaults ($RST=# clears offsets, $RST=* both) |
$SLP |
Sleep mode (disables steppers and spindle until reset) |
The realtime commands are single characters that act immediately, even in the middle of a job:
| Key | What it does |
|---|---|
? |
Status report: state, position, feed, overrides |
! |
Feed hold: decelerate and pause |
~ |
Cycle start: resume after a feed hold or M0 |
| Ctrl-X | Soft reset (stops everything; may lose position if the machine was moving) |
Your sender usually has buttons for all of these.
Supported G-codes in GRBL 1.1
GRBL supports the core of standard G-code. Everything below works; anything not listed is rejected with error:20 (unsupported command).
| Group | G-codes and M-codes |
|---|---|
| Motion | G0, G1, G2, G3, G38.2 to G38.5 (probing), G80 |
| Non-modal | G4 (dwell), G10 L2, G10 L20, G28, G28.1, G30, G30.1, G53, G92, G92.1 |
| Units, distance | G20, G21, G90, G91, G91.1 |
| Plane | G17, G18, G19 |
| Feed rate mode | G93 (inverse time), G94 (units per minute) |
| Work coordinates | G54 to G59 |
| Tool length offset | G43.1 (dynamic), G49 |
| Cutter compensation | G40 only |
| Path control | G61 |
| Program flow | M0, M1, M2, M30 |
| Spindle, coolant | M3, M4, M5, M8, M9 (M7 mist is a compile-time option) |
For what each code does, see our G-code and M-code list, G0 and G1, G2 and G3 arcs, and G54 work offsets.
GRBL's Limitations
GRBL packs a lot into an 8-bit chip, but there are things it can't do. Most "my program won't run" problems come from this list:
- No canned cycles. G81, G83 and the rest of the drilling cycles aren't supported; your CAM has to write out every move.
- No cutter compensation. Only G40 (comp off) is accepted. Toolpaths must be computed for the actual tool size, which is what CAM does anyway.
- No tool changes. M6 isn't supported. Senders handle tool changes by pausing the job so you can swap tools and re-zero Z.
- No macros, variables, or subroutines. No O-words, no
#variables, no M98. - Three axes on an Uno. A rotary 4th axis needs a fork or a 32-bit successor.
- G59.1 to G59.3 aren't supported, only G54 to G59.
The fix for most of these is the post processor. Choose a GRBL post in your CAM program (Fusion, Vectric, Carbide Create, Estlcam and most others include one) and it will write G-code GRBL understands. Before you run a new program, preview it in a G-code viewer such as CutViewer to catch mistakes before they become crashes.
G-code Senders for GRBL
You need a sender on your computer to run GRBL. The most popular ones are free:
- Universal Gcode Sender (UGS): Java-based, runs on Windows, Mac, Linux and the Raspberry Pi. Has a setup wizard for steps per mm, motor direction, and homing.
- gSender: from Sienci Labs, a friendly modern interface with probing and surfacing tools. Works with any GRBL or grblHAL machine, not just Sienci's.
- Candle: simple and lightweight; it's the sender bundled with many 3018 routers.
- bCNC: Python-based, with autoleveling for PCB milling and basic CAM built in.
- CNCjs: browser-based, popular on a Raspberry Pi next to the machine.
- OpenBuilds CONTROL: from OpenBuilds, also handles flashing GRBL.
- LaserGRBL (free, Windows) and LightBurn (paid): the usual choices for laser engravers.
Machine makers often have their own: Carbide Motion for Shapeoko and Easel for X-Carve. For more options, see our free CNC software and CNC router software guides.
GRBL vs. Mach3, LinuxCNC, and Commercial Controls
| GRBL | Mach3 / Mach4 | LinuxCNC | grblHAL / FluidNC | |
|---|---|---|---|---|
| Cost | Free | Paid license | Free | Free |
| Runs on | An Arduino; any PC sends G-code over USB | A Windows PC plus a motion controller | A dedicated Linux PC | A 32-bit board; USB, network or SD card |
| Axes | 3 | 6 | 9 | 6 or more |
| Canned cycles, cutter comp, macros | No | Yes | Yes | Partial |
| Best for | Hobby routers and lasers | Hobby and light production mills and routers | Retrofits, complex machines | Bigger hobby machines, upgrades from GRBL |
See our guide to choosing a CNC controller for the full comparison.
Troubleshooting GRBL
- An axis moves the wrong way: set the bit for that axis in
$3(X=1, Y=2, Z=4; add them for more than one axis). - Parts come out the wrong size: recalculate
$100to$102with the steps per mm calculator. - Motors stall or lose steps on rapids: lower the max rate (
$110to$112) or acceleration ($120to$122) by 10 to 20%. - The machine won't move and reports an alarm: GRBL locks out motion after an alarm. Fix the cause, then home with
$H(or unlock with$Xif you don't use homing). - "error:20" or another error number: look it up in our list of GRBL alarm and error codes.
- Random resets or limit alarms with the spindle running: usually electrical noise on the limit switch wires. See our guide to CNC electrical noise.
Frequently Asked Questions
What does GRBL stand for?
GRBL isn't an acronym. It's simply the project's name, pronounced "gerbil". You'll sometimes see expansions such as "G-code Reference Block Library", but those were made up after the fact.
Is GRBL the same as G-code?
No. G-code is the language a CNC program is written in. GRBL is the firmware that reads G-code and turns it into motor movements. GRBL understands a subset of standard G-code plus its own $ commands for settings and control.
Is GRBL still maintained?
GRBL's last release, 1.1h, came out in August 2019, and the original 8-bit version is essentially finished because it has run out of memory on the ATmega328P. Development continues in its 32-bit successors, grblHAL and FluidNC, which use the same G-code and $ commands.
What baud rate does GRBL use?
GRBL 1.1 uses 115200 baud (8 data bits, no parity, 1 stop bit). GRBL 0.8 and earlier used 9600.
Can GRBL control a 4th axis?
Not the standard GRBL 1.1 build on an Arduino Uno, which handles X, Y and Z. It can drive two motors on one axis (a dual-motor gantry) as a compile-time option. For a rotary 4th axis, use grblHAL or FluidNC.
How do I unlock GRBL after an alarm?
Find and fix whatever caused the alarm first. Then either run the homing cycle with $H, which is the safe choice because it re-establishes the machine's position, or send $X to clear the lock without homing. Our alarm code list explains each alarm.
What's the difference between GRBL and LaserGRBL?
GRBL is the firmware on the controller board. LaserGRBL is a free Windows program that sends G-code to a GRBL board, with tools for converting images into laser engraving jobs. LaserGRBL needs GRBL on the machine to work.
Does GRBL support tool changes?
GRBL doesn't support M6 or automatic tool changers. Most senders handle a tool change by pausing the job so you can swap the tool and reset Z, either with a probe or by touching off by hand. grblHAL adds real tool change support.
Be the first to know about updates at CNC Cookbook
Join our newsletter to get updates on what's next at CNC Cookbook.